- Build curiosity around your brand
- Stand out with custom shapes & sizes
- Easy to install, remove, and reuse
- Install inside or outside windows
Window Clings
Features
- Build curiosity around your brand
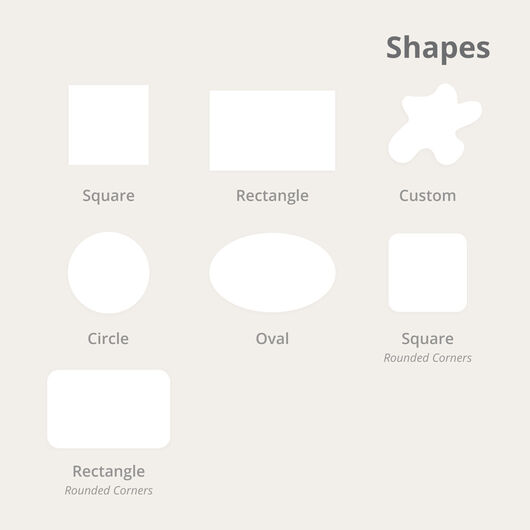
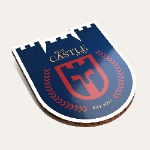
- Stand out with custom shapes & sizes
- Easy to install, remove, and reuse
- Install inside or outside windows
Build curiosity around your brand with window cling printing.
Maximize the use of your storefront with window cling printing. These clever window graphics make your shop, restaurant, or salon look professional and inviting. While some stores blend into the background, yours can stand out when you print your own window clings. The eye-catching signs can help capture customers’ attention and build interest around your brand. Give passersby and window-shoppers a treat! Add some oomph to your storefront merchandise display or grab attention on your new business hours. Whether you use them on your storefront or office, beautiful window clings will stop people in their tracks and encourage them to discover your business.
Find the Right Size for Your Display – Big or Small
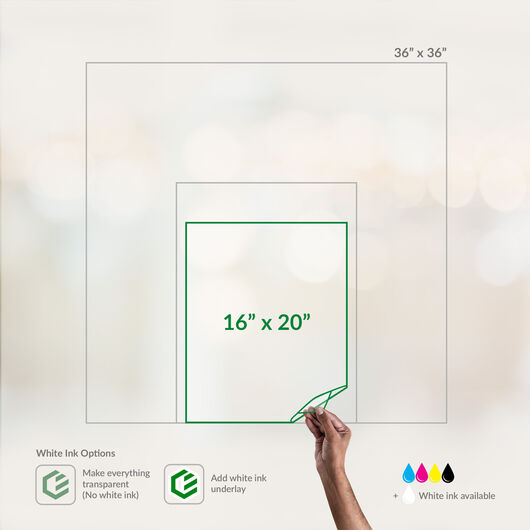
Our window clings come in 14 standard sizes. Narrow down your options and choose from our popular dimensions:
- 5" x 5"
- 5" x 7"
- 8" x 8"
- 16" x 20"
- 24" x 36"
In need of something unique and specific? Get your window clings in the exact measurements of your windows by choosing the Custom Size option and selecting the sizes you want. The smallest size is 3” x 3”, but you can go as big as 120” x 53”.
You can also choose from one of our free design templates hat you can design online or download as PDF . The window cling templates measure 16” x 20”, a size that’s perfect for announcing your store opening or latest products.
Make Your Own Window Clings
Ready to order window clings? Here are some tips to help you choose the right options:
This option is available only with clear static cling and can be customized with the following options:
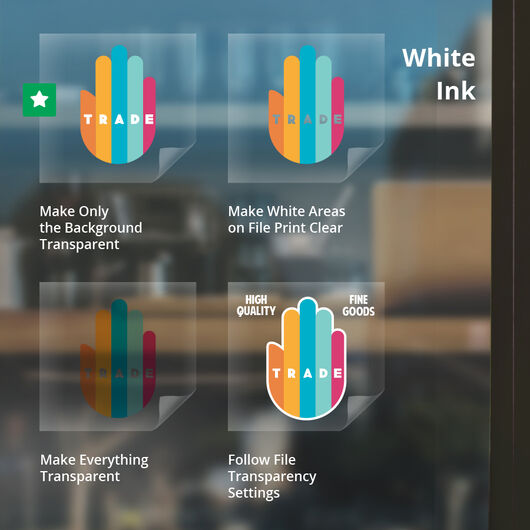
- All Transparent - No white layer will be added. Everything will be see-through. This is best suited for artwork with large text size and graphics.
- Only background prints clear - Only the text and image will have a white ink layer underneath, while the background remains see-through.
- White areas on file print clear - All the images, text, and background in white will be see-through. Other design elements will retain their respective solid colors.
- Follow File Transparency Settings - This option is for artwork that already has the right transparency and white layers. We will print your design as indicated. If you choose this option, we encourage you to select our free proof service during checkout to review your file for errors.
Spread Your Message from Inside or Outside the Window
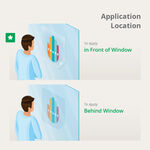
Wondering where to install your window clings? Application location refers to how the graphics will be applied and seen. Here are two options:
- In front of window - The non-printed side adheres to the surface. This option makes the artwork easier to see from a distance and works best for tinted windows.
- Behind Window - The print is on the cling side, which sticks to the glass. This protects the static clings from outside elements but is not best for tinted windows.
4 Steps to Installing Window Clings
Static clings do not require the use of adhesives, which means you can remove them and place them wherever your customers can easily spot them.
Make your window clings last long by installing them correctly. Here's how to do it:
Window Cling FAQs
Have your own questions? Find answers from others and ask your own questions.
Size. Color. Material. It's all here, and more.
2 Paper/Stock Options

White Static Cling
- Unprinted areas will be white
- Clings to smooth surfaces without adhesive
- Great for window graphics and signs
- Removable, repositionable and reusable

Clear Static Cling
- Unprinted areas will be clear
- Optional white ink underlay adds opacity to printed areas
- Apply to smooth surfaces without adhesive
- Removable, repositionable and reusable
- Can be installed inside or outside glass (Best to Install outside if glass is tinted)
Learn how to create window clings you’ll love.
Holiday Window Clings
Christmas is a season of gift-giving, merry-making and decorations set-up to celebrate the Yuletide cheer. Santa Claus, reindeers, snowman, candy...
Read MoreCustom Window Stickers
Window stickers, or window clings, are designs printed on a large plastic material. Since these don’t have an adhesive side like that of...
Read MoreCustomer Questions
We would not guarantee this kind of usage over time. The Clings are ok to be repositioned but not multiple times on a regular basis as these would eventualy tear or curl at the edges.
We will basically print the artwork you send to us whether this contains images, text, logos or other design elements. The issue we sometimes encounter with photographs is whether they were taken with the correct ratio and if they were intended for large format printing. Regular photos taken on phones or cameras intended for regular or album sized photographs are often times warped or the quality is affected when stretched. Having them with a 250-300 DPI resolution is one of our requirements and may help in enlarging the photo.
You may actually start by clicking on the "Start With a Free Proof" link so we may check the artwork if it is good for a window cling sized image before you make payment.
Primarily, if you use the white ink as the background and choose to apply the cling behind the window, the background would come out somewhat filtered by the glass or opaque and would not maximize the effect of your arttwork standing out from a white background. However, if you would really need the cling to be behind the window, you can still choose Clear Static Cling as Material but select the Follow File Transparency Settings as the White Ink Option. Your artwork should indicate that your background is white.
The Window Clings are not designed for being put outside of vehicles as primarily they do not have an adhesive. They stick using static but will eventually come off with exposure to the wind and moisture. We would suggest looking at our Car Decals if you wish to put them on the outside.
If you are on the Product Page, we can advise you to look at the thumbnails (next to the Configure and Price section) and scroll sidewards until the image of the four Clings that have "White Ink" as a title appears. You can see the various artwork where white ink is used. This will be a good basis of how to use White Ink to bring out the colors of your artwork and also where to use the transparent areas.
The more popular alternative is when you select the "Follow File Transparency " settings. As you can see the colors stand out better when there is a white border around the artwork which makes it more vivid as compared to the two other photos that are not transparent.
Your files will be reviewed for printing errors without paying a cent.
150+ print products to help you make a good impression. 1000+ options to customize to your heart’s content.
The product you want. The way you want. Professional printing guaranteed.


