
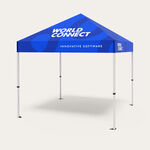


- High resolution digitally printed at 720 x 720
- Dye-Sublimation Graphic
- Scratch Resistant
- Weather Resistant (water proof coated fabric)
Event Tents
Features
- High resolution digitally printed at 720 x 720
- Dye-Sublimation Graphic
- Scratch Resistant
- Weather Resistant (water proof coated fabric)
Material:
- 6 oz. Tent Fabric (600x600 denier)
Size and Weight:
- Assembled (shortest) - 120"w x 120"d x 124.5"h
- Assembled (tallest) - 120"w x 120"d x 137"h
- Weight - 43 lbs (Hardware) + 8 lbs (Canopy Graphic) = 51lbs (Full Tent Package)
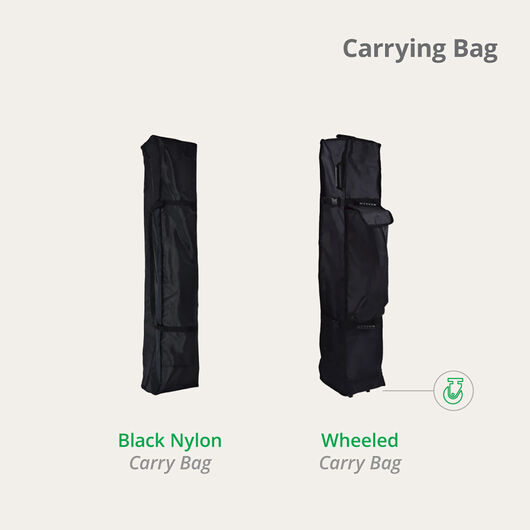
Optional Accessories:
- Carrying Bag w/ Wheels
- Sandbags
WARNING: This product can expose you to chemicals including Antimony Oxide (Antimony Trioxide), which is known to the State of California to cause cancer. For more information go to www.P65Warnings.ca.gov
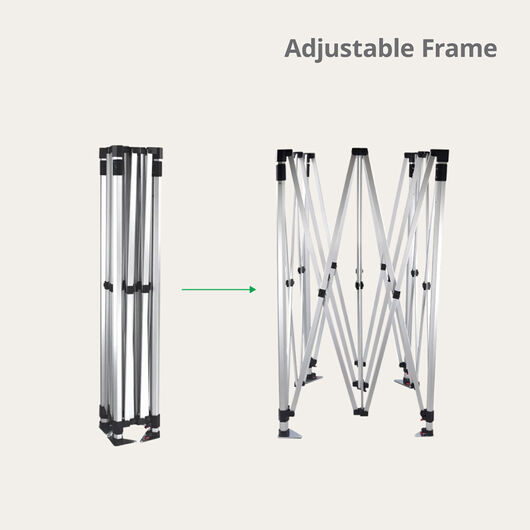
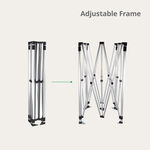
Installation Guide
- Remove Hardware from Carrying Bag.
- Be careful of the scissors sections of hardware as they are a pinching hazard.
- Standing across from each other, two people should use the center "V" of the hardware and lift up while stepping back. This will expand the frame. Stop when the frame is roughly 5 ft. wide.
- Unpack canopy graphic. Place on top of frame. Align canopy corners with hardware corners and fasten together using the Velcro.
- Standing across from each other, two people can each take a leg and lift up and step back. Expand the tent to the full 10 ft. On each leg, there is an auto slider. Slide each one into final position until they lock into place with a "click".
- Now to raise the tent. Stepping on the triangular foot, pull up on the hex hardware. The leg hardware will telescope up until it locks into the lowest raised position. This is easiest with a partner doing the same on the neighboring leg.
- Repeat the action on the final two legs. If more height is required, pres down the red switch on the leg joint and pull up the leg until the hardware once again locks into position. There are 4 height options to choose from.
Disassembly
Reverse the assembly instructions. Press down on the red switch on the leg joints and the auto-sliders to unlock the hardware.
Care Instructions
If you need to clean your tent canopy we recommend using warm water, mild soap, and a soft brush. Do not machine wash the canopy. As for the tent frame, you can use a damp cleaning cloth to remove dirt and scuff marks. When taking down the tent, start by lowering each tent leg to the lowest height by pressing in the red switch in the middle of each leg and pushing all the way down.
Next, press the red switch on the top of each leg and push down. This will unlock the tent. Start retracting the tent by using two people to lift up opposing legs and take steps forward. Once the tent is about five feet wide stop retracting and remove the canopy from the frame. Once the canopy is removed, continue to retract the tent frame until it is fully collapsed. Store the tent frame and canopy in an area that is dry and room temperature. Do not keep the canopy on the tent frame when storing, as this may cause snags or tears.
Event Tent templates.
Save time by using our free templates. Our templates have been setup with proper bleeds and margins, assuring your print job turns out accurate. To download, select a file type and click on the size below.