


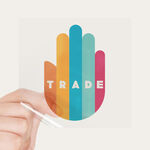

- Build curiosity around your brand
- Stand out with custom shapes & sizes
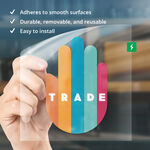
- Easy to install, remove, and reuse
- Install inside or outside windows
Window Clings
Features
- Build curiosity around your brand
- Stand out with custom shapes & sizes
- Easy to install, remove, and reuse
- Install inside or outside windows
Build curiosity around your brand with window cling printing.
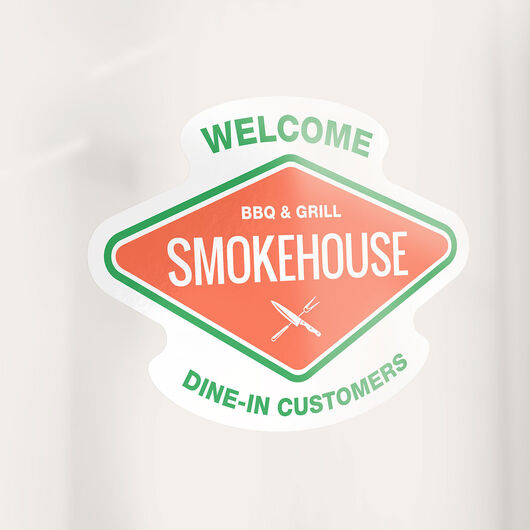
Maximize the use of your storefront with window cling printing. These clever window graphics make your shop, restaurant, or salon look professional and inviting. While some stores blend into the background, yours can stand out when you print your own window clings. The eye-catching signs can help capture customers’ attention and build interest around your brand. Give passersby and window-shoppers a treat! Add some oomph to your storefront merchandise display or grab attention on your new business hours. Whether you use them on your storefront or office, beautiful window clings will stop people in their tracks and encourage them to discover your business.
Find the Right Size for Your Display – Big or Small
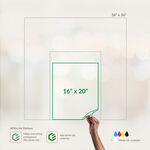
Our window clings come in 14 standard sizes. Narrow down your options and choose from our popular dimensions:
- 5" x 5"
- 5" x 7"
- 8" x 8"
- 16" x 20"
- 24" x 36"
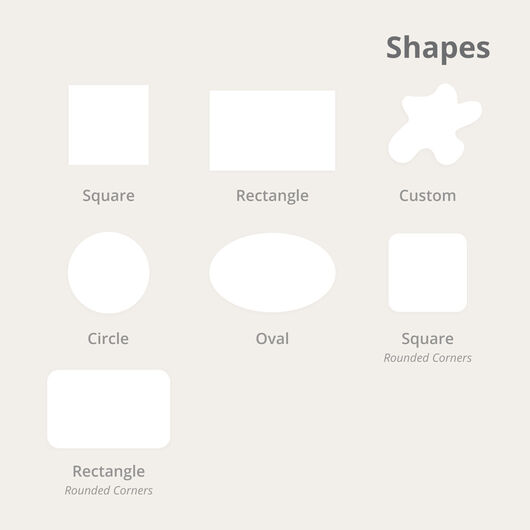
In need of something unique and specific? Get your window clings in the exact measurements of your windows by choosing the Custom Size option and selecting the sizes you want. The smallest size is 3” x 3”, but you can go as big as 120” x 53”.
You can also choose from one of our free design templates hat you can design online or download as PDF . The window cling templates measure 16” x 20”, a size that’s perfect for announcing your store opening or latest products.
Make Your Own Window Clings
Ready to order window clings? Here are some tips to help you choose the right options:
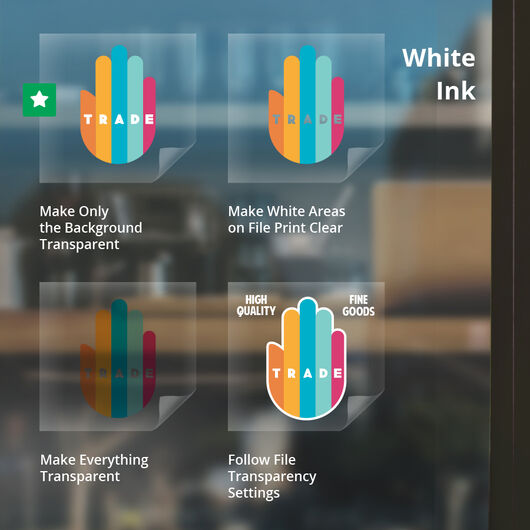
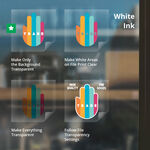
This option is available only with clear static cling and can be customized with the following options:
- All Transparent - No white layer will be added. Everything will be see-through. This is best suited for artwork with large text size and graphics.
- Only background prints clear - Only the text and image will have a white ink layer underneath, while the background remains see-through.
- White areas on file print clear - All the images, text, and background in white will be see-through. Other design elements will retain their respective solid colors.
- Follow File Transparency Settings - This option is for artwork that already has the right transparency and white layers. We will print your design as indicated. If you choose this option, we encourage you to select our free proof service during checkout to review your file for errors.
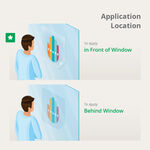
Spread Your Message from Inside or Outside the Window
Wondering where to install your window clings? Application location refers to how the graphics will be applied and seen. Here are two options:
- In front of window - The non-printed side adheres to the surface. This option makes the artwork easier to see from a distance and works best for tinted windows.
- Behind Window - The print is on the cling side, which sticks to the glass. This protects the static clings from outside elements but is not best for tinted windows.
4 Steps to Installing Window Clings
Static clings do not require the use of adhesives, which means you can remove them and place them wherever your customers can easily spot them.
Make your window clings last long by installing them correctly. Here's how to do it:
Window Cling FAQs
Have your own questions? Find answers from others and ask your own questions.
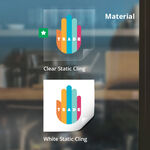
Size. Color. Material. It's all here, and more.
2 Paper/Stock Options

White Static Cling
- Unprinted areas will be white
- Clings to smooth surfaces without adhesive
- Great for window graphics and signs
- Removable, repositionable and reusable
Clear Static Cling
- Unprinted areas will be clear
- Optional white ink underlay adds opacity to printed areas
- Apply to smooth surfaces without adhesive
- Removable, repositionable and reusable
- Can be installed inside or outside glass (Best to Install outside if glass is tinted)
Learn how to create window clings you’ll love.
Holiday Window Clings
Christmas is a season of gift-giving, merry-making and decorations set-up to celebrate the Yuletide cheer. Santa Claus, reindeers, snowman, candy...
Read MoreCustom Window Stickers
Window stickers, or window clings, are designs printed on a large plastic material. Since these don’t have an adhesive side like that of...
Read MoreCustomer Questions
We can print on a clear static cling with the five colors (including white). Normally, we would put a white overlay but if you choose not to, we can also do that. We suggest that on the White Ink option, please select "Make Everything Transparent". We also suggest you ask for a free proof first so you can see on a PDF how it will print and speak to a file specialist to make sure we are following your instructions.
Definitely, You need to go to our Frosted Vinyl Lettering product. You will need to order a square or rectangular size to fit your circular desgn or logo and this will be cut out on the frosted material.
If you want the background of the mirror to be the same background as the cling, then you need to order transparent. The other option is to order the White Static Cling, meaning we will print on a white material so it stands out from the background. There is a diagram on the product page to show the four various options of your artwork and how it can stand out. This is for the White Ink options. Please check it out to see how your artwork should be treated best.
Yes, you may. However, depending on the marker you use, it will be difficult to erase. Please check our Dry Erase Adhesive Vinyl as this could be a viable option.
They do not use adhesive and use static cling to stick to the surface. If you wish to remove them properly and reuse them, you would need to use a little water and a squeegee so they wont be ripped. If you do intend to reuse them, it would be best to keep the backing paper they are shipped with so they may be stored properly.

Your files will be reviewed for printing errors without paying a cent.

150+ print products to help you make a good impression. 1000+ options to customize to your heart’s content.

The product you want. The way you want. Professional printing guaranteed.